

Writing
Document editor
You write your document in a ribbon editor that imports and exports .docx files. The ribbon at the top has seven tabs: Home, Insert, Analysis, Layout, References, Review and View. The editor saves your work automatically; the bottom bar says Saved.
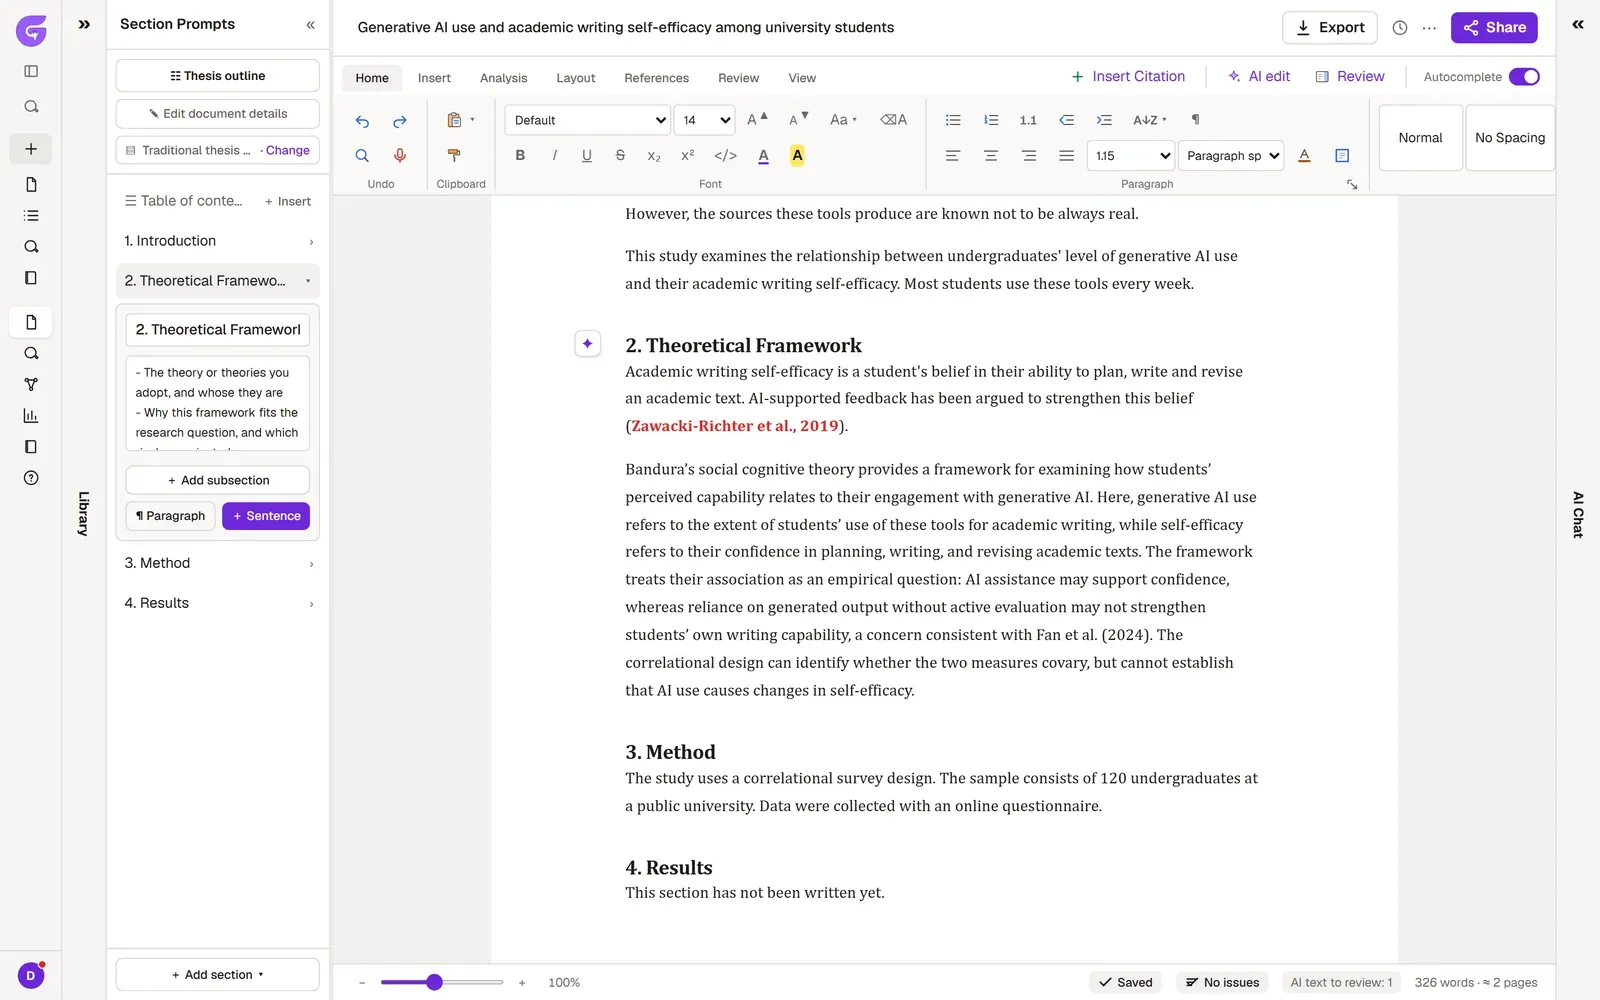
What’s where on the ribbon
Section titled “What’s where on the ribbon”| Tab | What’s on it |
|---|---|
| Home | Undo, Clipboard (paste, format painter), Font, Paragraph (lists, alignment, line spacing), Styles (heading styles, automatic heading numbering) |
| Insert | Pages (cover page, blank page, page break), Tables, Illustrations (image, screenshot, diagram, chart), Links, Comments, Header & Footer, Text, Symbols (equations), Import (.docx) |
| Analysis | Data upload, statistics and charts (Uploading data) |
| Layout | Page Setup (margins, orientation, columns, breaks, line numbers, hyphenation), indents and spacing, Arrange for the selected image |
| References | Table of Contents, Footnotes, Citations & Bibliography, Captions (figure and table captions), Index, Writing language, Writing register |
| Review | Academic review, submission check, citation check and the other checks (Review your thesis) |
| View | Read Mode, Print Layout, Web Layout, Focus, Read Aloud, Ruler, Navigation Pane, zoom |
Whichever tab you open, the same shortcuts sit at the right end of the ribbon: Insert Citation (+), AI edit (✦), the review panel and the Autocomplete switch. On a narrow screen, only their icons show.
When you click inside a table, two more tabs join the ribbon: Table Design and Table Layout.
Common tasks
Section titled “Common tasks”Headings
Section titled “Headings”Click the line and choose a heading level from Styles on the Home tab. Type / on an empty line to open a menu of blocks such as headings, lists, tables and equations.
Tables and images
Section titled “Tables and images”On the Insert tab, click Table or Image. Position and Wrap Text on the Layout tab set how an image sits in the text.
Footnotes
Section titled “Footnotes”Put the cursor where the footnote goes and click Insert Footnote on the References tab. Show Notes lists all your footnotes and endnotes.
Captions
Section titled “Captions”Click below the figure or table. On the References tab, open Insert Caption and choose Figure caption or Table caption. Grongy numbers them itself. Insert Table of Figures builds the list of figures and tables.
Table of contents
Section titled “Table of contents”Click Table of Contents on the References tab; Grongy builds the table from the headings in your document. After you change headings, click Update Table. A section you have not written yet shows the page it would start on, so update the table as you write.
Point at the table and Edit contents appears at its top right. On the sheet it opens you can rename headings, move them, add subheadings or remove sections. These changes go straight to the headings in your document. You also set the table’s title and how many levels it shows there.
Page layout
Section titled “Page layout”On the Layout tab, pick a preset from Margins or open the Page Setup window. This is where you set the font, spacing and page numbers your university asks for. Word and PDF files come out with these settings too.
Find and replace
Section titled “Find and replace”You open the find and replace window with the magnifying glass on the Home tab or with Ctrl+F.
Voice typing
Section titled “Voice typing”Click the microphone on the Home tab and speak; what you say is typed where your cursor is. This feature uses your browser’s speech recognition, so it may not work in every browser.
Frequently asked questions
Section titled “Frequently asked questions”Is there a Save button? You don’t need one; the editor saves automatically. To save right away, press Ctrl+S; this also leaves a snapshot in your version history.
How do I turn on heading numbers (1, 1.1)? There is an automatic heading numbering button in the Styles group on the Home tab.